In short
🍫 Custom calculator: Melt your chocolate in a double boiler
Specify your type of chocolate and quantity to obtain the ideal settings.
The ideal equipment for a successful bain-marie

Before even opening the chocolate bar, you need to have the right equipment on hand. It's not complicated, but a few wrong choices can ruin a preparation in minutes.
An unsuitable bowl, a pan that is too small, a surface that touches water — and the chocolate becomes grainy, burnt or solidified.
Here's what you really need to have to successfully make your chocolate bain-marie without stress!
Which bowl should I choose for melting chocolate?
The bowl is the central component of the bain-marie. It must possess two qualities: conduct heat gently and not react to contact with hot chocolate.
Thick glass and stainless steel are the two best choices.
Glass has the advantage of letting you see what's happening inside. Stainless steel heats evenly and is highly resistant to temperature variations.

On the other hand, forget about thin plastic. It warps, retains odors, and heats unevenly. Some plastics can even release undesirable compounds when exposed to heat. Now is not the time to take that risk.
The bowl should also be wider than the saucepan so it rests on the sides without falling in. This prevents the bottom of the bowl from dipping into the water. If the bowl touches the water, the heat becomes too direct and intense—the chocolate will overheat.
Thoroughly dry your bowl before using it, even if it appears dry. Pass it over the steam from the pan for a few seconds, then wipe it with a clean cloth. Residual moisture is the number one enemy of melted chocolate.
The saucepan suitable for a bain-marie
For the saucepan used in a bain-marie, a medium size is sufficient—generally 16 to 20 cm in diameter. It should be large enough to balance the bowl in it, but not too deep. If the saucepan is too tall, steam will accumulate under the bowl and could cause condensation.
The thick base is a real plus. It allows for more even heating and prevents hot spots. A classic stainless steel or enameled cast iron saucepan works perfectly.
The amount of water is just as important as the container itself. You need about 3 to 5 cm of water in the pan—enough to produce steam, but not enough to touch the bottom of the bowl. Check this level before placing the bowl on the pan: it's a step many people forget, and it's what causes the first problems.
Never use a pan with a damaged non-stick coating for your bain-marie. Chips of the coating can end up in your water or, through steam, contaminate your chocolate.
How do you melt chocolate in a double boiler?

The method is simple, but it's often botched due to small timing or technique errors. Follow the steps in order and you'll get smooth, shiny, and perfectly tempered melted chocolate.
Here's how to make a bain-marie for chocolate from A to Z.
Preparing the pot and the water level
Start by filling your saucepan with cold tap water. The target level is 3 to 5 cm maximum. No more. If you're unsure, place your empty bowl on top of the saucepan and visually check that it's not touching the water's surface.
Next, place the saucepan on the stove over low to medium heat. The goal is to bring the water to a temperature of 50°C to 60°C. At this point, you should see small bubbles forming on the bottom of the pan, but the water should not boil.
Some steam may appear — this is normal and it is this gentle steam that will heat your bowl.
If you have a kitchen thermometer, use it to check the water temperature before placing the bowl on the stove. This 10-second check can prevent many unpleasant surprises. Without a thermometer, visually check the temperature: a gentle simmer, never a rolling boil.
Prepare your water a little in advance, before breaking up your chocolate. This gives you time to check the level and adjust it without rushing.
Setting up the bowl and the chocolate
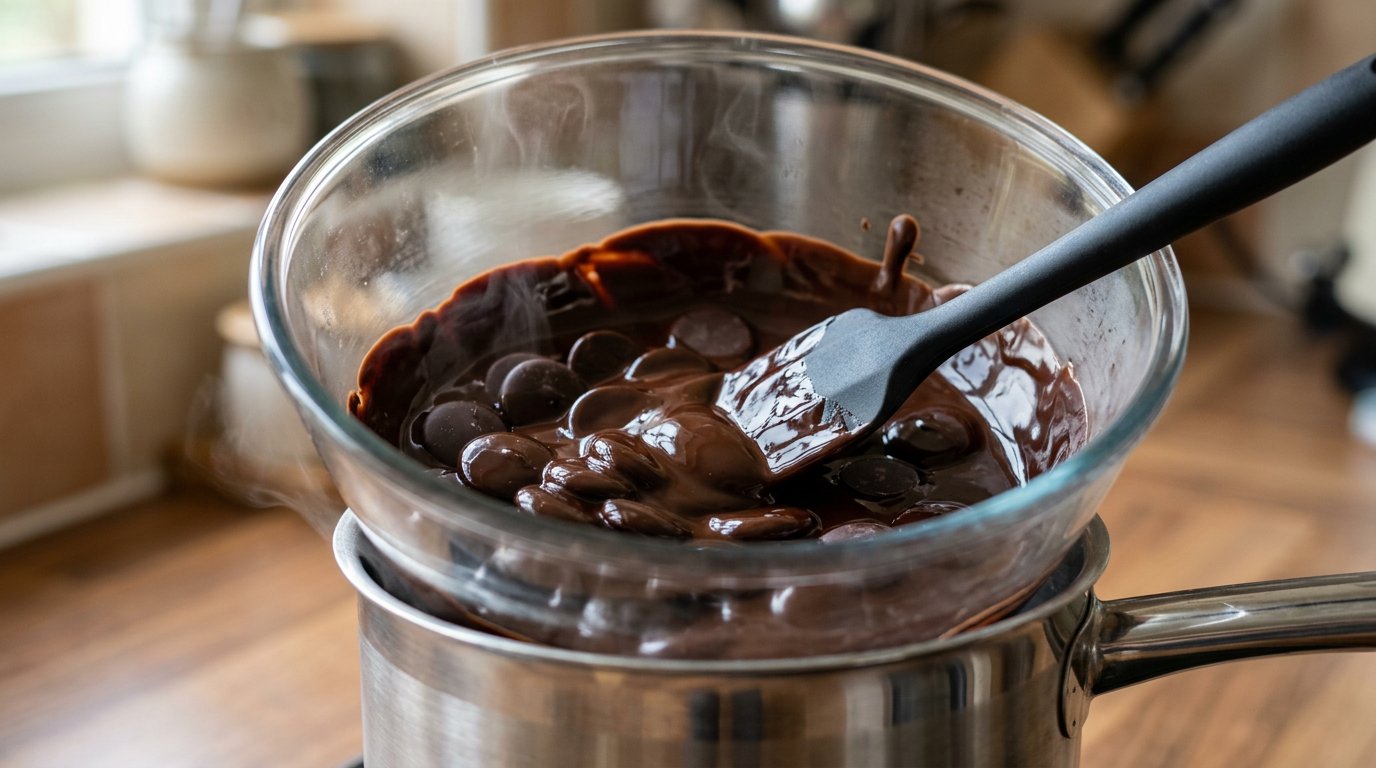
Once the water is hot (but not boiling), place your clean, dry bowl on the saucepan. Check that it rests securely on the sides and does not wobble.
Then add the chocolate, previously broken into small, even pieces or pistoles if you are using professional couverture chocolate.
Smaller pieces melt faster and more evenly. If you're using a tablet, break it into squares and cut each square in half or into thirds.
Avoid large blocks that take too long to melt and require increasing the heat — which increases the risk of overheating.
Let it rest for a few seconds without touching it. The chocolate will begin to soften slightly around the edges and base. This is the sign that you can start stirring.
Do not add anything else to the bowl at this stage — no water, no milk, no butter — unless your recipe explicitly calls for it at a specific stage.
Stirring and monitoring during melting
As soon as the chocolate starts to melt around the edges, stir gently with a silicone spatula or a wooden spoon.
Make slow, circular movements from the outside towards the center. The goal is to distribute the heat evenly, not to whip it.
Stir every 30 to 40 seconds. Between stirrings, keep an eye on the steam: if it becomes very intense or if the water starts to boil, immediately reduce the heat.
Melted chocolate should never exceed its melting temperature (see table below).
When the chocolate is completely smooth and lump-free, remove the bowl from the pan.
Quickly wipe the bottom of the bowl with a clean cloth to prevent water droplets from falling into your preparation.
Your chocolate, melted in a double boiler, is ready to use!
Chocolate is a heat-sensitive ingredient: a few degrees too much can make all the difference. Patience is your best tool when using a double boiler.
The ideal temperature for melting chocolate

This is probably the most underestimated point by beginners. Many think that "heating gently" is enough.
In reality, each type of chocolate has a specific temperature range that must be respected.
Going outside this range, even slightly, produces disastrous results: grainy chocolate, separation of cocoa butter, sandy texture.
Here is everything you need to know about the ideal temperature for melting chocolate.
Why water should never boil
Boiling water reaches 100°C. This is far beyond what chocolate can tolerate. When water boils, the steam produced is hotter and more aggressive.
It can raise the temperature of the bowl very quickly, especially if the bowl is made of stainless steel.
Overheated chocolate becomes grainy, loses its shine, and takes on a sandy or greasy texture. This is irreversible in most cases. You can't "fix" burnt chocolate; you have to start all over again.
The water temperature in a bain-marie for chocolate should remain between 50°C and 60°C. Within this range, the steam is gentle, the heat rises gradually in the bowl, and you maintain control.
If you see boiling bubbles, lower the heat immediately or remove the pan from the heat momentarily.
The steam from boiling water can also cause condensation inside the bowl — and this condensation turns water into a direct enemy of your chocolate. A double risk, then.
Temperatures vary depending on the type of chocolate
Each chocolate has a different composition. The more milk or sugar it contains, the more sensitive it is to heat.
Here are the melting temperatures to follow to melt dark, milk or white chocolate effectively in a bain-marie:
| Type of chocolate | Melting point | Special Features |
|---|---|---|
| Dark chocolate | 50 °C – 55 °C | More robust, better heat tolerance |
| Milk chocolate | 45 °C – 50 °C | Be careful with milk proteins, they burn quickly |
| White chocolate | 40 °C – 45 °C | Very fragile, melts quickly and burns easily |
| couverture chocolate | 50 °C – 55 °C | Rich in cocoa butter, melts very well |
To measure the temperature of melted chocolate, use a probe thermometer or an infrared thermometer. It's not a useless gadget—it's a practical tool that transforms a random result into a controlled one.
How long should you melt chocolate in a bain-marie?
How long does it take to melt chocolate in a bain-marie? Allow between 5 and 10 minutes depending on the quantity and type of chocolate.
A 100g bar of chocolate, cut into small pieces, melts in 5 to 6 minutes over low heat. For 200g or more, allow 8 to 10 minutes.
Never turn up the heat to go faster: you risk burning the chocolate before it is completely melted.
Patience is definitely the rule here!
Dark, milk or white chocolate: what changes

Not all chocolates react the same way to heat. Their composition directly influences how they behave in a bain-marie. Understanding these differences helps you adapt your technique and avoid common mistakes.
Here are the specific points to remember when choosing baking chocolate for melting.
Dark chocolate and couverture chocolate
Dark chocolate is the easiest to melt. Its high cocoa content (a minimum of 50%, often 60% to 70% for baking) gives it superior thermal stability. It tolerates slightly higher temperatures without separating or graining.
is Baking couverture chocolate even better for use in a bain-marie. It contains more cocoa butter than regular bar chocolate, making it more fluid when melted and shinier once cooled.
It's the go-to product for professional pastry chefs. It often comes in pistoles (small discs) which melt very evenly — a real advantage for a smooth result.
For glazing or coating, dark couverture chocolate is ideal. It gives that characteristic shine seen on the yule logs and entremets in pastry shop windows.
Milk chocolate and white chocolate
These two chocolates require more attention.
Milk chocolate contains milk proteins that burn more easily than pure cocoa. It melts at a lower temperature (45°C to 50°C) and requires even lower heat than dark chocolate. Stir more often and check the temperature more regularly.
White chocolate, however, is the most temperamental. It does not contain cocoa mass — only cocoa butter, sugar and milk.
Its melting range is narrow (40°C to 45°C) and it can go from "perfectly melted" to "granular and unrecoverable" in a few seconds.
With white chocolate, the heat should be very low, almost barely on. Stir constantly as soon as it starts to melt.
For white chocolate, remove the bowl from the heat as soon as half the chocolate has melted and continue stirring off the heat. The residual heat of the bowl will often be enough to finish melting without risk of overheating.
Mistakes to avoid when using a bain-marie

Even with the right equipment and temperatures, certain mistakes often occur. These relate to heat, texture, and humidity. Knowing them in advance is already half the battle.
Here are the most common problems and their concrete solutions for a chocolate bain-marie without lumps and without unpleasant surprises!
Why does chocolate burn or separate?
Burning chocolate is almost always a case of excessive heat. The water was boiling, the bowl was touching the water, or the heat was too high for too long.
Burnt chocolate gives off a pungent odor and turns a darker color, sometimes with black specks. It cannot be salvaged—it must be made from scratch.
The separation (or "slicing") is different: the chocolate becomes oily and grainy, with an oily phase separating from the solid mass. It is the cocoa butter that dissociates from the rest.
This happens when the temperature is too high or when too little liquid has been added or too abruptly.
The solution for chocolate that curdles in a bain-marie : add a tablespoon of warm liquid cream (not cold, not boiling) and stir vigorously.
In some cases, the chocolate will regain a smooth texture. But if the chocolate is truly burnt, no amount of cream will be able to salvage the taste.
Lumps and seizing chocolate: the solutions
Lumps in melted chocolate often result from melting too quickly or uneven heating. If you've used large pieces, the center will remain solid while the outside overheats.
That's why you should always break the chocolate into small, even pieces before you start.
Chocolate that solidifies during melting is often the victim of contact with water (see next section) or a drop in temperature that is too sudden.
If the chocolate starts to harden in the bowl, place the bowl back on the pan over very low heat and stir gently.
Add a spoonful of warm cream if needed to soften it.
- Lumps in the melting process → pieces too large, uneven heating
- Chocolate that seizes → contact with water or sudden drop in temperature
- Sandy texture → overheating, generally irreversible
- Chocolate too thick → add a little warm cream, never water
If your chocolate is too thick after melting, stir in warm heavy cream, one tablespoon at a time, mixing well between each addition. Never add water: it will cause the chocolate to seize instantly.
Moisture in the bowl, a fatal mistake
This is probably the most common mistake when using a bain-marie — and the least expected. Just one drop of water in the bowl, and the chocolate immediately seizes: it becomes compact, lumpy, and impossible to spread.
This phenomenon is called the "seizing" of chocolate.
Moisture can come from several sources: a bowl that hasn't dried properly, steam rising from under the bowl and forming condensation, or wet hands above the bowl. Steam from the pan is the most common cause.
That's why the bowl needs to be slightly wider than the pan — to prevent steam from passing between the bowl and the pan and falling back inside.

To avoid this every time:
- Dry the bowl with a clean cloth before starting
- Never cover the bowl while melting
- Wipe the rim of the pan if steam is escaping
- Do not stir with a wet spoon
- Avoid working over the sink or on a wet surface
A perfectly dry bowl is the first condition for successful melted chocolate. Not heat, not timing — dryness.
What to do with melted chocolate?

Once your chocolate is melted and smooth, the hardest part is over. Now you just need to use it at the right time — melted chocolate cools down quite quickly, so you need to be ready.
Here are the most common uses and some practical tips so that the chocolate bain-marie works well for both fondue and cake.
To glaze a cake or coat fruit
The topping is one of the most popular applications.
A cake, sponge cake or brownie covered with a thin layer of melted dark chocolate immediately takes on the appearance of a professional pastry shop.
For a brilliant result, the chocolate should be used at approximately 35°C to 40°C — slightly cooled after melting but still very fluid.
Some tips for getting a shiny and smooth melted chocolate that holds: pour it in the center of the cake placed on a wire rack, then gently tilt the cake to let the chocolate drip down the sides.
Smooth only once with a spatula — going back and forth creates marks and makes the shine disappear.
To coat strawberries, bananas or candied oranges, dip them in melted chocolate using a skewer or fondue fork.
Place them on parchment paper and let them cool at room temperature, not in the refrigerator — the cold causes the chocolate to whiten on the surface.
Homemade chocolate fondue and truffles
is Chocolate fondue using a bain-marie the most user-friendly method. You can keep the bowl on the saucepan over very low heat throughout the entire meal, stirring occasionally to maintain a smooth consistency.
Serve with fresh fruit, marshmallows, shortbread cookies or pieces of brioche.
For homemade truffles, melted chocolate is mixed with hot cream to form a ganache.
The basic proportion is simple: 100g of dark chocolate to 10cl of whole liquid cream.
Let it cool, refrigerate until the ganache is firm, then roll it into balls and coat them in unsweetened cocoa powder.
It's one of the most accessible pastry preparations — and one of the most relevant to give as a gift!
- Gentle and gradual heating, ideal for chocolate
- Easy temperature control
- Very low risk of scalding if the water does not boil
- Works for all types of chocolate
- No special equipment needed
- Slower than in a microwave
- Risk of moisture if the bowl is not positioned correctly
- Requires constant monitoring
- Extra dishes (saucepan + bowl)
- Not very practical for very small quantities
Practical questions
Can any bowl be used to melt chocolate in a double boiler?
No. Thick glass or stainless steel bowls are the best choices. Thin plastic should be avoided: it heats unevenly and can warp. The bowl should also be wider than the pan so it rests on the sides without touching the water, and it must be completely dry before use.
What should I do if my melted chocolate is too thick or starts to solidify?
Add the warm cream, one tablespoon at a time, stirring between each addition. Never use water: even a small amount will cause the chocolate to seize instantly, making it lumpy and unusable. Also, return the bowl to the saucepan over very low heat if the temperature has dropped too low.
Why did my chocolate become grainy and lumpy when melted in a bain-marie?
Several causes are possible: the water in the pan was boiling, the bowl was touching the water, a drop of moisture fell into the chocolate, or the temperature was too high. Grainy chocolate caused by overheating is difficult to fix. If it's due to moisture, try adding a spoonful of warm cream and stirring vigorously.
What is the difference between melting dark chocolate and white chocolate in a double boiler?
White chocolate is much more delicate. Its melting point is lower (40°C to 45°C compared to 50°C to 55°C for dark chocolate), and it can go from perfectly melted to burnt in seconds. With white chocolate, maintain a very low heat, stir continuously, and remove the bowl from the heat as soon as it has begun to melt, then finish off the heat.
How long can melted chocolate be stored before using it?
Melted chocolate sets quickly at room temperature, usually in 20 to 30 minutes depending on the quantity. To keep it fluid longer, keep the bowl on the saucepan over very low heat, stirring occasionally. If the chocolate has cooled and set, you can gently remelt it once more in a double boiler without significantly affecting its quality.


