
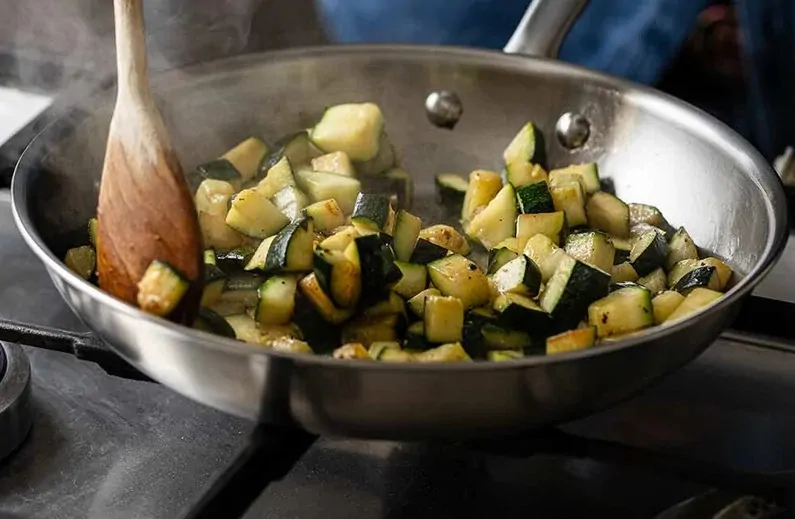
Have you just bought a beautiful stainless steel pan or are you still hesitating to take the plunge? I completely understand!
For a long time, I avoided stainless steel for fear that everything would stick. Then I understood that it was precisely the preferred utensil of chefs for good reason: nothing beats stainless steel for obtaining a beautiful golden crust, flavorful cooking juices and controlled cooking.
Contrary to popular belief, cooking with stainless steel is no more complicated than with a non-stick pan. You just need to know a few basic techniques (which I'll share in this article) and, above all, choose the right recipes to get started!
Stainless steel pans offer unparalleled advantages: resistance to all temperatures, the ability to deglaze and collect all those delicious caramelized juices, exceptional durability, and above all, no coating that degrades over time. They are an excellent investment for years of gourmet cooking.
In this article, I offer 15 recipes specifically designed for stainless steel, from breakfast to dinner. These recipes will showcase the capabilities of this magical pan and allow you to gradually master its use.
Ready to transform the way you cook? Let's go!
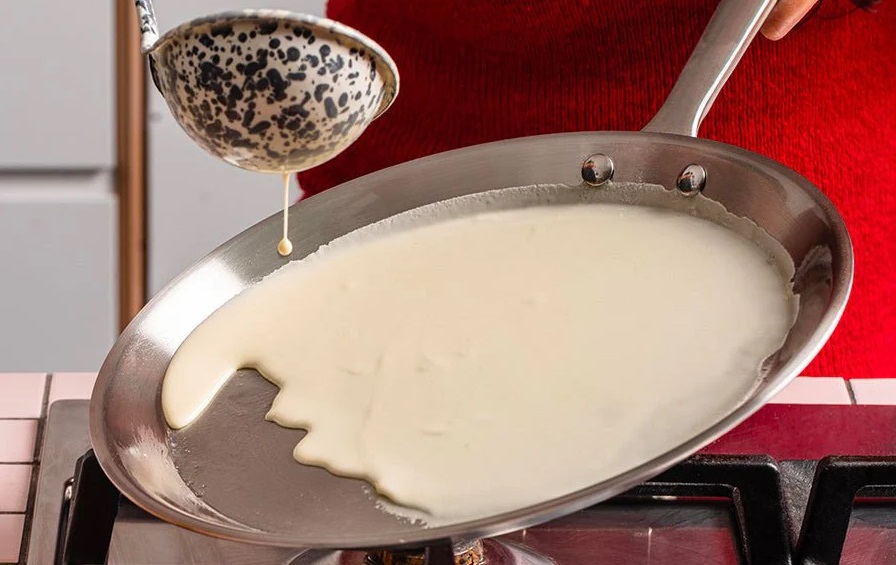
5 STAINLESS PAN BREAKFASTS AND BRUNCHES
1. Creamy French-style scrambled eggs
Preparation time: 8 minutes
Serves: 2
Ingredients :
- 6 fresh eggs
- 30g of butter
- 3 tablespoons of thick crème fraîche
- Salt, freshly ground pepper
- Freshly chopped chives
Recipe :
- Crack the eggs into a bowl and beat them lightly with a fork and a pinch of salt
- Place your stainless steel pan over medium-low heat (really not too high!)
- Add half the butter and let it melt gently without browning
- Pour in the beaten eggs and wait 30 seconds without touching
- Using a wooden or silicone spatula, begin to stir gently, bringing the edges towards the center
- Continue this slow and steady movement for 5-6 minutes
- When the eggs begin to set but are still runny, remove the pan from the heat
- Immediately incorporate the remaining butter and the fresh cream
- Mix gently and let it rest for 30 seconds (the residual heat will finish cooking)
- Season with pepper and sprinkle with chives
What makes all the difference: The key to perfect scrambled eggs is patience and gentle heat. With stainless steel, the heat is distributed evenly, resulting in that creamy texture impossible to achieve in a non-stick pan heated too high.
The first attempts may be surprising, but once you understand the timing, there's no going back!
Anti-stick tip: Never heat eggs too high. Stainless steel prefers gradual heating.
2. Ultra-fluffy thick pancakes
Preparation time: 20 minutes
Serves: 4 (approximately 12 pancakes)
Ingredients :
- 250g of flour
- 2 tablespoons of sugar
- 1 sachet of baking powder
- 1 pinch of salt
- 2 eggs
- 300 ml of milk
- 50g of melted butter
- 1 tsp vanilla extract
- Butter for cooking
Recipe :
- In a large bowl, mix the flour, sugar, yeast and salt
- In another bowl, whisk the eggs with the milk, melted butter, and vanilla
- Pour the liquid ingredients over the dry ingredients
- Mix only until the flour is just incorporated (lumps are normal and even desirable!)
- Let the dough rest for 5 minutes while you heat the pan
- Heat your stainless steel pan over medium heat for a good 2 minutes
- Test the temperature: a drop of water should bead and slide off the surface
- Lower the heat slightly and add a small knob of butter
- Wipe off the excess with absorbent paper (only a thin film should remain)
- Pour a small ladleful of batter (do not spread it, it should spread naturally)
- Wait until bubbles form on the surface and burst (approximately 2 minutes)
- Gently turn over and continue cooking for 1 minute
- Keep warm while you do the others
My secret weapon: With stainless steel, I get those beautiful, golden, and perfectly even pancakes you see in American diners. The secret? A stable temperature and that light film of butter wiped off between each batch.
Serving: Pile them generously with maple syrup, fresh fruit and a pat of melting butter on top.
3. Crispy potato pancakes (Rösti)
Preparation time: 25 minutes
Serves: 4
Ingredients :
- 800g of firm-fleshed potatoes
- 1 yellow onion
- 2 eggs
- 3 tablespoons of flour
- Salt, pepper, nutmeg
- Neutral cooking oil
Recipe :
- Peel the potatoes and grate them using a coarse grater
- Place them in a clean cloth and squeeze firmly to extract as much water as possible
- Finely chop the onion
- In a large bowl, mix the grated potatoes, onion, beaten eggs and flour
- Season generously with salt, pepper and a pinch of nutmeg
- Heat your stainless steel pan over medium-high heat with 2 tablespoons of oil
- Wait until the oil is thoroughly heated (it should be shiny and slightly rippled)
- Drop large spoonfuls of the mixture onto the prepared surface and flatten them into 1 cm thick patties
- Cook for 4-5 minutes without moving to create a nice golden crust
- Gently turn it over and continue cooking for 4 minutes on the other side
- Drain on absorbent paper
Why stainless steel makes the difference: It is really with stainless steel that these galettes develop this irresistible crispy crust while remaining melting inside.
The intense heat and conduction of stainless steel create this texture that is impossible to achieve in a Teflon pan and even with a cast iron or aluminum pan.
Side dish: Serve with smoked salmon and lemon-flavored crème fraîche for a restaurant-worthy brunch.
4. Caramelized French toast (pain perdu)
Preparation time: 15 minutes
Serves: 4
Ingredients :
- 8 slices of thick white bread (or stale brioche)
- 4 eggs
- 200 ml of whole milk
- 2 tablespoons of sugar
- 1 teaspoon of ground cinnamon
- 1 tsp vanilla extract
- 40g of butter for cooking
- Icing sugar for serving
Recipe :
- In a shallow bowl, whisk together the eggs, milk, sugar, cinnamon and vanilla
- Dip each slice of bread in this mixture for 20 seconds on each side (the bread should soak up the mixture well)
- Heat your stainless steel pan over medium heat
- Add a generous knob of butter and let it melt until it foams slightly
- Place 2-3 slices of soaked bread (depending on the size of your pan)
- Let it cook for 3 minutes without touching it to obtain a beautiful golden caramelization
- Gently turn over and continue for 2-3 minutes
- The French toast should be golden brown and slightly crispy on the outside
- Repeat with the remaining bread, adding butter each time
The perfect browning trick: In stainless steel, the sugar in the French toast mixture caramelizes beautifully on contact with the hot surface.
This is what creates that beautiful golden crust and slightly caramelized flavor we love. Don't be afraid to let it get that lovely color!
Gourmet serving: Sprinkle with icing sugar, add fresh red berries and a drizzle of maple syrup. A treat on Sunday morning.
5. Button mushrooms sautéed with garlic and parsley
Preparation time: 12 minutes
Serves: 4 people
Ingredients :
- 500g of fresh button mushrooms
- 3 cloves of garlic
- 1 nice bunch of flat-leaf parsley
- 40g of butter
- 2 tablespoons of olive oil
- Salt, freshly ground pepper
- 1 dash of lemon juice
Recipe :
- Clean the mushrooms quickly with a damp paper towel (do not wash them with water)
- Cut them into quarters if they are large, leave them whole if they are small
- Finely mince the garlic and chop the parsley
- Heat your stainless steel pan over high heat with olive oil
- Wait until the oil is thoroughly heated (this is crucial!)
- Add all the mushrooms at once
- Don't touch it for a good 3 minutes! Resist the urge to stir
- The mushrooms will release their water and then begin to brown
- Once they have a nice color, stir and let them cook for another 2 minutes
- Add the butter and garlic, mix for 1 minute
- Season with salt and pepper
- Remove from heat, add the chopped parsley and a squeeze of lemon
Why does it work so well? The intense heat of the stainless steel allows the water in the mushrooms to evaporate quickly, browning them instead of boiling them. This is the secret to flavorful, not at all rubbery, mushrooms.
With a non-stick pan, you never reach the temperature necessary for proper browning!
Perfect for: Accompanying fried eggs, topping toasted bread, or serving as an accompaniment to meat.
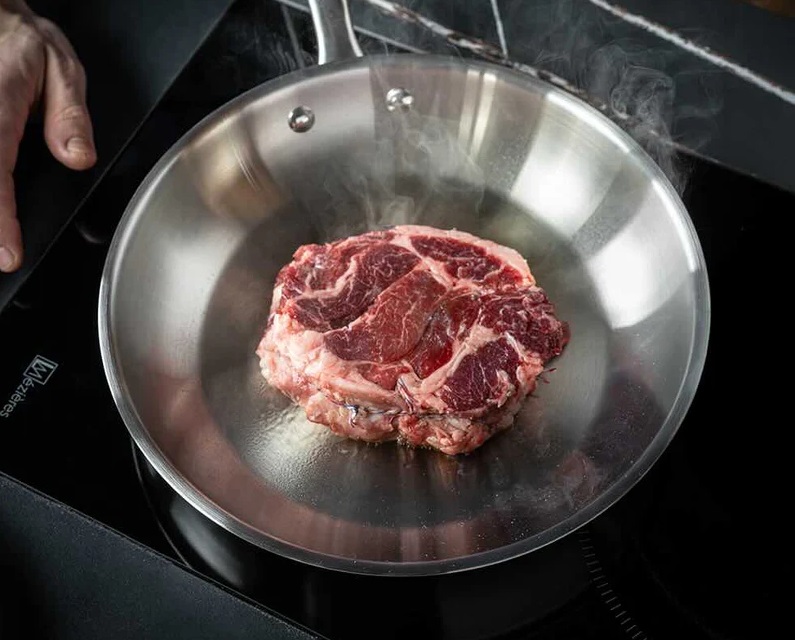
5 MAIN DISHES THAT SHOWCASE STAINLESS STEEL
6. Pan-roasted chicken with creamy mushroom sauce
Preparation time: 35 minutes
Serves: 4
Ingredients :
- 4 chicken breasts with skin
- 250g of button mushrooms
- 2 shallots
- 2 cloves of garlic
- 200 ml of liquid cream
- 150 ml of chicken stock (or white wine)
- 2 tablespoons of olive oil
- 30g of butter
- Fresh thyme
- Salt, pepper
Recipe :
- Take the chicken out of the fridge 20 minutes beforehand and dry it well with paper towels
- Season the chicken breasts generously with salt and pepper on both sides
- Heat your stainless steel pan over medium-high heat with the oil
- Place the supremes skin-side down first
- Don't touch them for 6-7 minutes (this is when everyone panics and turns them over too soon!)
- The skin will brown beautifully and detach itself from the pan
- Carefully turn over and continue cooking for 5 minutes on the flesh side
- Remove the chicken and keep it warm under foil
- In the same pan with the juices, add the butter
- Sauté the chopped shallots for 2 minutes
- Add the sliced mushrooms and garlic, and cook for 4 minutes
- Pour in the stock (or wine) and scrape the bottom of the pan well with a wooden spoon to loosen all the caramelized juices (this is deglazing, the magic of stainless steel!)
- Let it reduce by half
- Add the cream and thyme, and simmer for 3 minutes
- Return the chicken to the sauce to reheat for 1 minute
- Adjust the seasoning
What I learned: At first, I was turning my chicken too soon for fear it would stick. The result? Torn skin and not crispy at all! Now I know that when it's ready, the skin peels off by itself. Patience is truly the secret with stainless steel.
The extra touch: This smooth sauce with caramelized juices is the signature of cooking with stainless steel. Impossible to reproduce with any other pan.
7. Salmon fillet with ultra-crispy skin
Preparation time: 15 minutes
Serves: 4
Ingredients :
- 4 salmon fillets with skin (approximately 150g each)
- 2 tablespoons of neutral oil (grapeseed or sunflower)
- 30g of butter
- 1 lemon
- Salt, pepper
- Fresh dill
Recipe :
- Take the salmon out of the fridge 15 minutes beforehand
- Dry the paving stones thoroughly with absorbent paper (especially the skin)
- Season only the flesh side with salt and pepper
- Heat your stainless steel pan over medium-high heat with the oil
- Wait until the oil is nice and hot and shiny
- Place the blocks skin-side down
- Gently press down with a spatula for the first 30 seconds to ensure the skin is flat
- Cook for 8 minutes skin-side down without touching it (for a 2-3 cm thick steak)
- The skin will become incredibly crispy and golden
- Gently turn it over and add the butter to the pan
- Drizzle the melted butter over the salmon with a spoon (this is called "basting")
- Continue cooking for a maximum of 2 minutes on the flesh side
- The salmon should remain pink in the center
- Remove and let rest for 2 minutes
- Squeeze in some lemon juice and sprinkle with fresh dill
Why is stainless steel unbeatable for fish? That ultra-crispy salmon skin that detaches cleanly from the pan is proof that your technique is perfect.
In a non-stick pan, you will never achieve this result because the temperature is not high and stable enough.
The temperature test: If you place your salmon in the pan and it sticks immediately, the pan wasn't hot enough. You need to wait for that critical point where the oil is slightly rippling.
If you love salmon in all its forms, I've also published Sophie Dudemaine's delicious recipe for two-salmon tart.
8. Lamb chops with parsley and garlic, rosemary jus
Preparation time: 20 minutes
Serves: 4
Ingredients :
- 8 lamb chops
- 4 cloves of garlic
- 1 bunch of flat-leaf parsley
- 80g of fine breadcrumbs
- 2 sprigs of fresh rosemary
- 100 ml of red wine
- 50g of butter
- 2 tablespoons of olive oil
- Salt, pepper
Recipe :
- Take the lamb chops out of the refrigerator 20 minutes beforehand
- Finely chop the garlic and parsley, mix with the breadcrumbs
- Season the ribs with salt and pepper
- Heat your stainless steel pan over high heat with olive oil
- Sear the lamb chops for 2 minutes on each side for a pink center
- Remove them from the pan and immediately brush them with the parsley and garlic mixture, which will adhere to the hot meat
- Keep warm under aluminum foil
- In the same pan, discard the cooking fat
- Add 20g of butter and the rosemary sprigs
- Let it steep for 30 seconds over medium heat
- Pour in the red wine and scrape the bottom vigorously to collect all the juices
- Let it reduce by half (about 2 minutes)
- Remove the rosemary
- Remove from heat and whisk in the remaining butter to thicken the sauce
- Spoon this juice over the ribs and serve immediately
Cooking temperature: For perfectly pink ribs, the internal temperature should reach 55-57°C. A kitchen thermometer is your best friend when starting out.
What makes this recipe exceptional: The caramelized juices from the lamb create the base for an absolutely sublime sauce. This is the magic of deglazing with a stainless steel pan, which cannot be replicated anywhere else.
9. Shrimp sautéed with garlic, chili and parsley
Preparation time: 12 minutes
Serves: 4
Ingredients :
- 600g of large peeled prawns
- 6 cloves of garlic
- 1 fresh red chili pepper (or Espelette pepper)
- 1 large bunch of flat-leaf parsley
- 80g of butter
- 2 tablespoons of olive oil
- Juice of 1 lemon
- Salt
Recipe :
- Dry the shrimp thoroughly with paper towels (this is crucial)
- Finely mince the garlic, chop the parsley, and mince the chili pepper
- Heat your stainless steel pan over very high heat with the olive oil
- Wait until the oil is really very hot (it should almost be smoking)
- Throw all the shrimp into the pan at once
- Leave them still for 1 minute 30 seconds so they can take on a nice color.
- Turn them over quickly and leave for another minute
- Add the butter, garlic and chili pepper
- Sauté for 1 minute, stirring constantly
- Remove from heat and add the lemon juice and parsley
- Add a little salt and mix
Why a very high heat is necessary: The shrimp need to sear quickly to caramelize without releasing water. This is where stainless steel excels: it reaches very high temperatures and maintains a stable temperature even when cold ingredients are added.
My beginner's mistake: For a long time, I stirred my shrimp as soon as they touched the pan. The result: they boiled in their own juices instead of browning. Now I resist the urge to touch them for the first minute and a half. The difference is spectacular.
Serving suggestion: Serve with jasmine-scented rice or good slices of toasted country bread for dipping.
10. Veal Milanese
Preparation time: 25 minutes
Serves: 4
Ingredients :
- 4 thin veal escalopes (approximately 120g each)
- 100g of flour
- 2 eggs
- 150g of fine breadcrumbs (or panko for extra crispiness)
- 80g of grated Parmesan cheese
- Zest of 1 lemon
- Olive oil for cooking
- Salt, pepper
- Arugula and lemon wedges to serve
Recipe :
- Lightly flatten the escalopes between two sheets of cling film with a rolling pin (they should be about 5mm thick)
- Prepare three shallow bowls: one with the seasoned flour, one with the beaten eggs, and one with the breadcrumbs mixed with Parmesan cheese and lemon zest
- Coat each escalope in flour (shake off the excess), then in egg, then in breadcrumbs, pressing firmly so they adhere
- Let it rest for 5 minutes in the fridge (this helps the breading to stick well)
- Heat your large stainless steel pan over medium heat with 3-4 mm of olive oil
- Test the temperature with a piece of breadcrumbs: it should sizzle immediately
- Gently place the escalopes (cook in two batches if necessary, do not overcrowd)
- Let it cook for 3 minutes without moving
- Gently turn over and continue for 2-3 minutes
- The breading should be golden brown and crispy
- Drain on absorbent paper
Stainless steel vs. non-stick for frying: Stainless steel allows you to reach and maintain a perfect, constant oil temperature. The result: ultra-crispy breading that doesn't absorb the oil. Impossible with a non-stick pan, which can't withstand high temperatures.
Traditional serving: On a bed of fresh rocket drizzled with lemon juice and olive oil, with lemon wedges on the side. Yum!
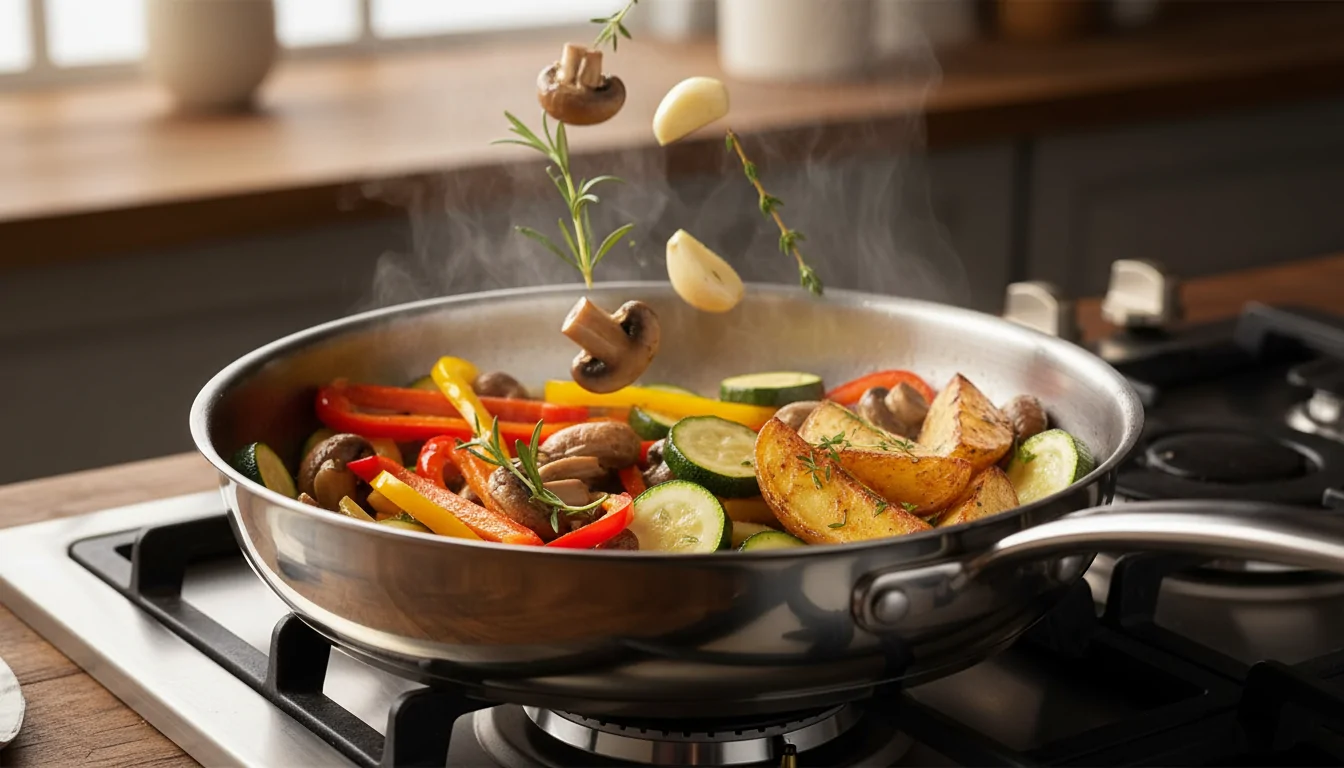
5 PERFECT STAINLESS STEEL SIDES AND TOPPINGS
11. Sautéed potatoes, Lyonnaise style
Preparation time: 30 minutes
Serves: 4
Ingredients :
- 800g of firm-fleshed potatoes (Charlotte or Roseval)
- 2 large yellow onions
- 3 tablespoons of neutral oil
- 40g of butter
- 2 tablespoons chopped flat-leaf parsley
- Salt, pepper
Recipe :
- Wash the potatoes and cook them for 15 minutes in boiling salted water (they should remain slightly firm)
- Drain them and let them cool
- Peel them and cut them into 5mm slices
- Finely slice the onions
- Heat your stainless steel pan over medium heat with 2 tablespoons of oil
- Fry the onions for 8-10 minutes until they are golden brown and slightly caramelized
- Remove them and set them aside
- In the same pan, add the remaining oil and increase the heat to medium-high
- Add the potatoes in a single layer (cook in batches if necessary)
- Let it brown for 4-5 minutes without touching it
- Gently turn over and leave for another 4 minutes
- The potatoes should be crispy and golden brown
- Return the onions to the pan
- Add the butter and mix gently
- Season generously with salt and pepper
- Sprinkle with chopped parsley just before serving
The secret to a golden crust: Patience! Don't turn your potatoes every 30 seconds. Leave them alone and they'll develop that irresistible crispy crust that everyone loves.
Variation: Add some smoked bacon bits cooked separately for an even more indulgent version!
12. Mediterranean grilled vegetables
Preparation time: 25 minutes
Serves: 4
Ingredients :
- 2 courgettes
- 2 bell peppers (1 red, 1 yellow)
- 1 eggplant
- 2 red onions
- 3 whole garlic cloves with their skin on
- 4 tablespoons of olive oil
- Fresh thyme
- Salt, pepper
- Balsamic vinegar
Recipe :
- Cut all the vegetables into similarly sized pieces (approximately 2 cm)
- Heat your large stainless steel pan over high heat
- Start with the eggplants and 1 tablespoon of oil
- Let them brown for 4 minutes on one side without moving, turn them over, and cook for 3 minutes on the other side
- Pick up and reserve
- Do the same with the courgettes (3 minutes per side)
- Then add the peppers and onions together (4 minutes, stirring occasionally)
- Add the unpeeled garlic cloves and let them caramelize for 2 minutes
- Put all the vegetables back in the pan
- Add the fresh thyme and the remaining olive oil
- Season generously with salt and pepper
- Cook together for 2-3 minutes to blend the flavors
- Drizzle with a little balsamic vinegar off the heat
Why grill in batches? Each vegetable has its own cooking time. By cooking them separately, you prevent some from burning while others are still raw. And above all, you avoid overcrowding the pan, which would lower the temperature.
Storage: These grilled vegetables can be kept for 3-4 days in the fridge and are delicious cold in a salad or in a sandwich.
13. Green beans sautéed with garlic and slivered almonds
Preparation time: 15 minutes
Serves: 4
Ingredients :
- 500g of extra-fine green beans
- 3 cloves of garlic
- 50g of flaked almonds
- 30g of butter
- 1 tablespoon of olive oil
- Juice of 1/2 lemon
- Salt, pepper
Recipe :
- Trim the green beans and blanch them for 4 minutes in boiling salted water
- Plunge them immediately into ice water to stop the cooking process
- Drain them thoroughly and dry them in a tea towel
- Mince the garlic finely
- Heat your stainless steel pan over medium heat with the oil
- Toast the flaked almonds for 2 minutes, stirring constantly
- As soon as they are golden brown, remove them and set aside
- Turn up the heat to high and add the green beans
- Sauté them for 3-4 minutes, stirring regularly
- They should have some slightly charred areas
- Add the butter and garlic, mix for 1 minute
- Remove from heat and add the toasted almonds and lemon juice
- Season with salt and pepper
Perfect texture: Green beans should remain crisp with some caramelized areas. It's the high-heat cooking in stainless steel that creates these delicious charred spots, impossible to achieve otherwise.
Variation: Replace the almonds with pine nuts or crushed hazelnuts.
14. Sautéed fresh spinach with butter and nutmeg
Preparation time: 10 minutes
Serves: 4
Ingredients :
- 800g of fresh baby spinach leaves
- 40g of butter
- 2 shallots
- 1 clove of garlic
- Freshly grated nutmeg
- 3 tablespoons of crème fraîche (optional)
- Salt, pepper
Recipe :
- Wash the spinach thoroughly and drain it (it may remain slightly damp)
- Finely chop the shallots and garlic
- Heat your stainless steel pan over medium heat with 20g of butter
- Sauté the shallots for 2 minutes until translucent
- Add the garlic, mix for 30 seconds
- Increase the heat to high and add all the spinach (yes, all at once even if it boils over!)
- Stir constantly with tongs or a spatula
- The spinach will wilt in 2-3 minutes
- Once they have completely fallen off, continue cooking for 1 minute to evaporate the excess water
- Add the remaining butter and cream if desired
- Season generously with salt, pepper and freshly grated nutmeg
- Mix well and serve immediately
The trick to keeping spinach from being watery: The key, once again, is high heat. Spinach releases a lot of water. In a hot stainless steel pan, this water evaporates quickly instead of boiling. The result is flavorful, not soggy, spinach.
What changed my relationship with spinach: I used to hate spinach because it always ended up as a watery, green mush. Then I realized that you just had to cook it for a very short time over high heat. Now, with this stainless steel technique, I could eat it every day!
15. Pan-fried green asparagus, parmesan cheese and lemon
Preparation time: 15 minutes
Serves: 4
Ingredients :
- 500g of green asparagus
- 3 tablespoons of olive oil
- 30g of butter
- 50g of shaved parmesan
- Zest of 1 organic lemon
- Juice of 1/2 lemon
- Salt, pepper
- Toasted pine nuts (optional)
Recipe :
- Wash the asparagus and snap off the tough part at the base (it will naturally break off in the right place)
- If the asparagus spears are thick, lightly peel the lower third with a vegetable peeler
- Dry them thoroughly with a cloth
- Heat your stainless steel pan over high heat with olive oil
- Wait until the oil is nice and hot
- Arrange the asparagus in a single layer
- Let them grill for 3 minutes without moving
- Turn them over a quarter turn
- Leave for another 2 minutes
- They should have nice charred areas and remain crispy
- Reduce the heat to medium and add the butter
- Roll the asparagus in the melted butter for 1 minute
- Season with salt and pepper
- Arrange on a serving dish
- Immediately sprinkle with parmesan shavings (they will melt slightly on contact)
- Add the lemon zest and juice
- Finish with some toasted pine nuts if you like
Why stainless steel transforms asparagus: The charred areas created by the intense heat of stainless steel impart a smoky flavor and an incomparable texture. It's almost as if they've been barbecued.
My springtime pleasure: As soon as the first asparagus arrives at the market, this is my favorite recipe. Simple, quick, delicious. Perfect as a starter or as a side dish with fish.
COMPARATIVE TABLE: STAINLESS STEEL AND OTHER MATERIALS
| Criteria | Stainless steel frying pan | Non-stick (Teflon) | Cast Iron | Iron |
|---|---|---|---|---|
| Maximum temperature | Very high (no limit) | Average (260°C max) | Very high | Very high |
| Development of juices | ★★★★★ Excellent | ★☆☆☆☆ None | ★★★★☆ Very good | ★★★★☆ Very good |
| Thermal reactivity | ★★★★★ Fast | ★★★☆☆ Average | ★★☆☆☆ Slow | ★★★☆☆ Average |
| Longevity | 20+ years | 2-5 years | Generation | 10-20 years old |
| Interview | Easy (dishwasher safe) | Delicate | Specific | Specific |
| Oven compatibility | Yes, without limit | No (handle) | Yes | Yes |
| De-icing possible | Yes ★★★★★ | No | Yes | Yes |
| Weight | Light | Very light | Very heavy | AVERAGE |
| Purchase price | €€€ (60-150€) | € (20-50€) | €€ (50-100€) | €€ (40-80€) |
| Cooking eggs | ★★★☆☆ Technical skills required | ★★★★★ Easy | ★★☆☆☆ Difficult | ★★★☆☆ Technical skills required |
| Meat coloring | ★★★★★ Perfect | ★★☆☆☆ Average | ★★★★★ Perfect | ★★★★★ Perfect |
| Health | Inert, healthy | Risks if overheated | Healthy | Enriched with iron |
What we learn from this chart: Stainless steel isn't necessarily the "best" material in absolute terms, but it's the most versatile and durable. It's the preferred tool of chefs for proteins and anything requiring deep browning. For very delicate eggs, non-stick coatings are simpler, but stainless steel handles everything else better and will last ten times longer.
4 ESSENTIAL TECHNIQUES FOR MASTERING STAINLESS STEEL
1. The water droplet test: knowing when your pan is ready
Why is this important? 90% of adhesion problems stem from improper temperature control. Too cold, it sticks. Too hot, it burns.
The technique:
- Heat your empty stainless steel pan over medium heat for 2-3 minutes
- Drop a drop of water into the pan
- Observe carefully:
- If the water sizzles and evaporates immediately → too cold
- If the water forms a bead that glides and rolls across the surface like a mercury ball → perfect, that's the Leidenfrost point
- If the water instantly turns to smoke → too hot, turn down the heat
Once the correct point is reached:
- Add your fat (oil or butter)
- Wait until it is warm and shiny
- Place your food
- Leave them alone!
My personal learning experience: For months, I didn't understand why sometimes it worked and sometimes it didn't. Until a chef friend showed me this pearl test. It changed everything. Now I never start without checking.
2. Deglazing: collect all the caramelized juices
What is it? It's the art of dissolving the caramelized juices stuck to the bottom of the pan to create a divine sauce. It's THE signature technique of stainless steel cooking that you can't do with non-stick.
The 4-step method:
- Remove the meat or fish and keep it warm
- Remove excess grease by wiping it with absorbent paper (leave just a little).
- Pour the liquid (wine, broth, vinegar, even water) into the still hot pan
- Scrape the bottom vigorously with a wooden spoon or spatula while letting it reduce
Liquids that work well:
- Red wine for red meats
- White wine for fish and poultry
- Chicken or vegetable broth
- Balsamic vinegar for a sweet and tangy taste
- Cognac or port for a festive version
The result: A concentrated sauce, full of deep flavors, with very few ingredients. That's what real French cuisine is all about.
3. The golden rule: never force it to turn over
The principle: When food is ready to be turned in a properly heated stainless steel pan, it will release easily. If it resists, it's not ready.
How does it work?
- When you deposit a protein (meat, fish, chicken), it first adheres to the surface
- When cooked, it develops a crust that shrinks slightly
- This crust creates a barrier that naturally detaches from the stainless steel
- At that precise moment, it slides out on its own when you slide the spatula underneath
Approximate timing for knowing when to try:
- Salmon steak (skin on): 7-8 minutes
- Chicken breast: 6-7 minutes on the first side
- Beef steak: 3-4 minutes depending on thickness
- Thin escalope: 2-3 minutes
The temptation to avoid: Wanting to check if "it's golden" every 30 seconds. Resist! Trust the process. The first time, it's nerve-wracking. The tenth time, it's magic.
4. Easy cleaning: the professional method
The myth: "Stainless steel is a pain to clean."
The reality: With the right cleaning technique, maintenance is much simpler than with a non-stick pan that isn't dishwasher safe.
The 3-step technique:
1. Deglazing with water (immediately after cooking):
- Pour water into the still-hot pan (be careful of splashes)
- The water boils instantly and loosens all the residue
- Scrape gently with a wooden spatula
- Empty the water
2. Normal washing:
- Wash with warm soapy water and a sponge
- For stubborn residues, boil water with a drop of dish soap
- Use the scraper side if needed (stainless steel is durable!)
3. Drying (important):
- Wipe immediately with a clean cloth
- This prevents limescale stains
- Your pan remains shiny
For stubborn stains or slightly burnt surfaces:
- Sprinkle with baking soda
- Add a little water to make a paste
- Rub in circles with a sponge
- Rinse and dry
Bonus: Dishwasher safe! Stainless steel is dishwasher safe without any problem! Convenient after a big meal.
IN BRIEF: WHY CHOOSE A STAINLESS STEEL PAN?
As you'll have gathered from these 15 recipes, cooking with stainless steel is anything but complicated once you understand the basics. It's even become my favorite kitchen utensil, the one I reach for instinctively.
The real reasons to choose stainless steel:
✓ Unparalleled flavors thanks to caramelized juices and deglazing
✓ Exceptional durability — a purchase for at least 20 years
✓ No coating that deteriorates over time
✓ Total versatility: from gently cooking eggs to high-temperature roasting of meats
✓ Oven-safe with no temperature limits
✓ Easy to clean and dishwasher-safe
✓ Healthy: no substances that degrade or migrate into food
✓ Economical in the long run despite the initial investment
What this will actually change in your kitchen:
Before stainless steel, my chickens had pale, soft skin. Now it's crispy and golden.
Before, I used to throw away my leftover food. Now, I make delicious sauces in 2 minutes.
Before, I had to buy a new pan every 2-3 years. My stainless steel one is now 5 years old and is like new.
Who is stainless steel made for?
Honestly, for anyone who cooks regularly, whether you're a beginner or an experienced cook, stainless steel will teach you to cook better. It forces you to understand temperature, timing, and patience. It's a fantastic teacher.
The only exception: if you're only cooking eggs, keep your small non-stick pan as a backup. But for everything else, stainless steel wins hands down.
My tips for getting started
Start with a single 24-26 cm frying pan. Choose a good brand (Cristel, De Buyer, All-Clad, Demeyere, Atma). Yes, it's an investment (expect to pay €80-150), but you'll be using it every day for decades.
Opt for 18/10 stainless steel pans, i.e. with 18% chromium and 10% nickel, for better resistance.
Start with the simple recipes in this article: sautéed mushrooms, roast chicken, grilled vegetables. Once you master the water droplet test and the patience of not flipping, you'll be hooked.
And above all, don't give up at the first hiccup! Even professional chefs have their mistakes. It's all part of learning!
TO GO FURTHER
Some useful resources:
- The science of the Leidenfrost point explained simply
- Buyer's guide to the best stainless steel pans on Que Choisir
The brands I recommend:
- Cristel : French-made, very good quality, practical removable handles
- De Buyer : a historic French brand, excellent value for money
- Demeyere : high-end, exceptional thermal diffusion
- All-Clad : the American benchmark (a bit pricey but indestructible)
- Atma : a rising French brand offering quality utensils
UP TO YOU !
What recipe will you try first in your stainless steel pan? Have you had any previous experiences (good or bad) with stainless steel?
Share your successes, questions, and tips in the comments! And if you liked this article, feel free to share it with your friends who are struggling with their stainless steel pans.
Pin this article on Pinterest so you can easily find it when you're looking for cooking inspiration!
This article allowed us to address the following themes
Stainless steel pan recipes, cooking with stainless steel, how to use a stainless steel pan, sticky stainless steel pan, stainless steel cooking techniques, deglazing a pan, cooking juices, stainless steel pan maintenance, best stainless steel recipes, stainless steel pan for beginners, chicken in a stainless steel pan, salmon in a stainless steel pan, stainless steel pancakes, scrambled eggs in a stainless steel pan, sautéed vegetables in a stainless steel pan…
Feel free to ask us your questions or share your own favorite recipes!
